Scammell Scarab Demonstration Model by Bassett-Lowke
This is the story of the restoration of a 1:8 scale model Scammell Scarab and trailer that were built by the renowned model making company Bassett-Lowke. The model was originally built to enable the Scammell sales staff to demonstrate the versatlity and simplicity of using the automatic coupling system to potential customers. The model is now owned by The Mechanical Horse Club but in the intervening years it had spent some time in less caring hands and had suffered a fair amount of damage. Thankfully the high build quality employed by the Bassett-Lowke engineers had ensured it remained more or less intact.
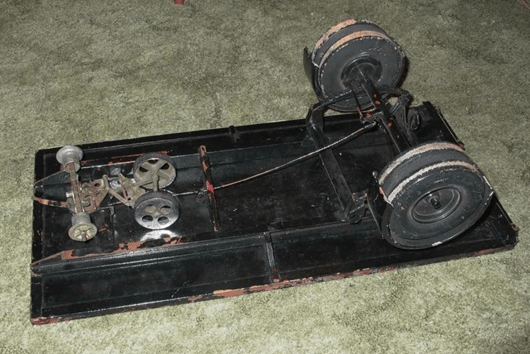
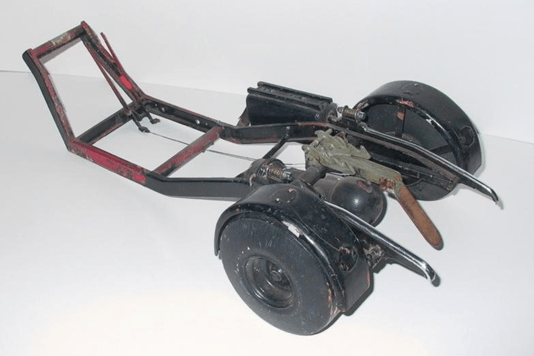
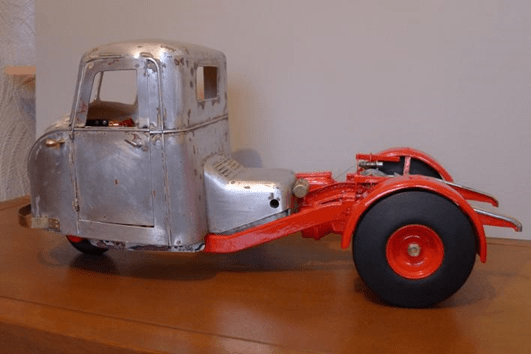
The Scarab tractor unit had lost 2 key items; the driver’s side door and the complete front wheel assembly, and would probably take longer to restore than the trailer so I decided to tackle the latter first. At some point in its life the whole setup had been painted with thick black paint so the first job was to remove this and reveal what lay beneath: a red and cream livery, as per the prototype! Actually, not so much of the original paint remained so what was revealed was mostly bare metal which, apart from the aluminium mudguards, was all brass! This must have been expensive at the time the model was made (late 1940’s?), but I guess steel was harder to acquire with it being in demand elsewhere.
As mentioned earlier, the Bassett-Lowke models were built to demonstrate the versatility of the Scammell automatic coupling system so, as you would expect, this is a fully functioning feature on the models. Another working feature is the handbrake linkage on the trailer which also works via a lever in the cab and via the thrust bar located in the centre of the coupling, again as per the prototype. Unfortunately the handbrake linkage wasn’t working on this trailer due mainly to the fact that the handrake lever pivot bracket and the crossmember carrying the cable link had at some time parted company with the chassis.
The crossmember was silver soldered back in place as was the pivot for the handbrake lever and this improved matters greatly, the linkage still didn’t work properly though because the brake rods had got bent over the years so wouldn’t run freely through the bushes to the rear of the brake back plates. After a bit of tweaking here and there the rods were able to move once again. The front support and rack arrangement for the handbrake lever were missing so new ones were made from brass and screwed in place.
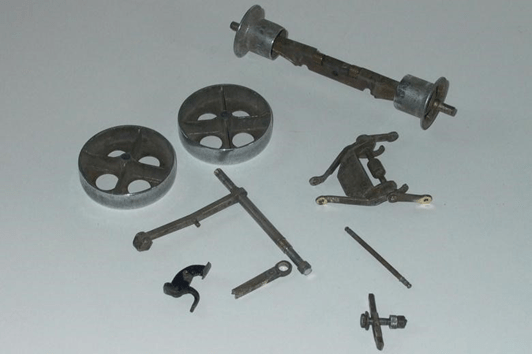
The road wheels didn’t rotate freely and the outer lip of one wheel rim was quite badly chipped so the retainers and wheels were removed. The wheels and tyres are turned from pieces of wood, the badly chipped wheel was put in the lathe and the remaining fragments machined off to create a flat surface onto which a new lip could be fixed. I then machined an old camera lens filter mounting ring to suit and once complete glued it in place. The stub axles were then cleaned and polished and this was all that was required to ensure the wheels would be free again. The wheels and tyres were then painted and left to dry whilst work continued on the trailer.
One of the main arms of the coupling assembly was broken so the remaining complete one was measured up and a replica made from rectangular brass bar. The top pivot had also broken away from the turntable assembly; this was originally riveted in place but this wasn’t possible with the turntable in situ so it was screwed in place instead. The whole assembly was then loosely assembled to make sure it worked ok before being stripped down again so that it would be easier to paint the framework. One last repair was carried out before the frame could be rubbed down, this being a couple of the mudguard mounting brackets which had come adrift and had to be soldered back in position.
Once all the loose paint was removed the brasswork was painted with a special undercoat intended for use on fibreglass and yellow metals. Once dry a coat of white undercoat was applied all over and then the underframe was treated to 3 coats of Japlac signal red enamel whilst the upper framework was given 2 coats of Japlac cream.
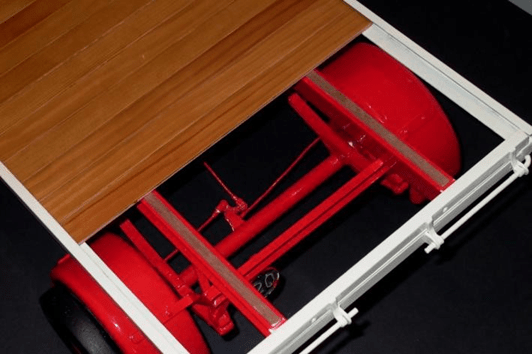
Planks for the decking were cut from 7/8” x 1/8” pine and then painted with 3 coats of oak coloured satin
varnish. 1/16” wood strips were then stuck to the top of the main chassis rails to allow the decking to sit flat down. The decking timbers were slid into the side rails and held in place by 3/16” square wood strips inside the side rails.
The rear wheels were then refitted and the coupling arrangement reassembled, the final job being to paint the 20MPH sign on the back of the trailer.
Work on the Scarab commenced by removing the loose parts from the chassis and scraping all the horrible thick black paint from it to reveal the original red paint underneath. This was badly damaged in places so it was decided to take it back to bare metal, and that produced a surprise! Whereas the trailer chassis was built using brass sections the Scarab is made from steel which, it has to be said, is in surprisingly good condition. The mudguards are aluminium, as on the trailer, and the gearbox/differential casing assembly is made from wood.
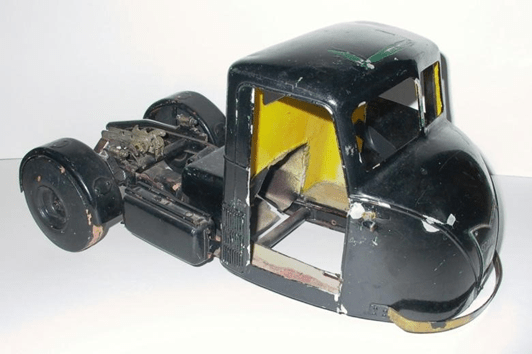
With the chassis stripped my thoughts turned to making a new front wheel assembly; the model had been used as a toy when it was found in a garden and the front wheel/steering unit plus the driver’s door and some other small parts hadn’t survived the ordeal. I wrote to the archivist at the Bassett-Lowke Society to see if he had any more information about the Scarabs (quietly hoping they might have some original drawings, as I know they have some for their railway products) but it wasn’t to be. So, a start was made
by making a new mounting bracket to sit on the front cross-tube which in turn would hold a right-angled drive for the steering gear.
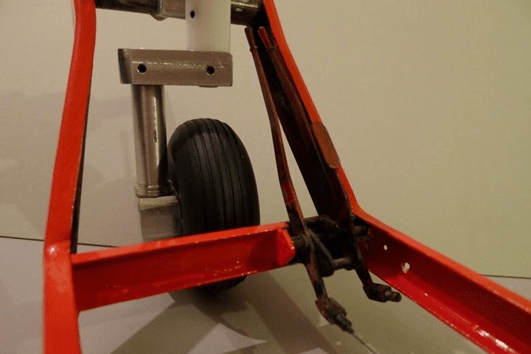
One of the biggest problems when building scale road vehicles is finding suitable wheels and tyres, and finding a front wheel for the Scarab was no exception! After some serious head scratching the model aircraft world provided the solution and some landing wheels intended for large scale radio controlled planes were purchased. The next task was to make the vertical column and bottom hub, these were turned from aluminium on the lathe (Bassett-Lowke used wood but I’m more comfortable working with metal).
With the front wheel assembly assembled and fitted to the chassis my attention turned to the rear of the vehicle.
Fortunately the coupling hook assembly had survived ‘the play years’ but the two safety bar assemblies which sit just above the ends of the turntable beam (when the trailer is coupled) hadn’t been so lucky. New ones were made from aluminium angle and rectangular section which will hopefully prove to be sturdier than the originals. The whole chassis was then given a final rub down and painted with Humbrol white undercoat followed by 2 coats of Japlac Signal Red.
The original uncoupling gear was complete and had survived being played with for many years remarkably well, so once I’d made a new tie rod for the brake mechanism and straightened the levers in the cab it all worked again as intended.
With the new front wheel in place and connected to a right angle drive it just needed some means of turning it – a Meccano steering wheel along with a Huco universal joint did the trick. I’m not certain what Bassett-Lowke used for their steering mechanism as it’s hidden behind a cover, I presume they used a worm and pinion but can’t be 100% certain. Although their setup is more prototypical they also break rather easily due to there being very little support for the steering column so I decided to make something which (hopefully!) looks OK but would also be more rugged.
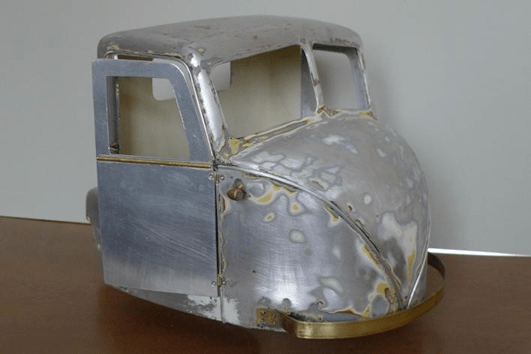
With the cab loosely bolted in place a new floor was cut from good quality plywood, supplied by the local model shop and usually used for making model dolls houses. The original seats were positioned and screwed to the floor, then everything was removed so the cab could be taken off and rubbed down. Prior to that a new drivers door had to be made so a template was made by copying the passengers door and then transferring it to a sheet of 16 SWG aluminium sheet. Once cut out and finished to fit, the door was mounted on two brass hinges which were sourced at the same model shop, now sadly closed! The cab was
then rubbed down to bare metal, then painted inside and out with undercoat and two coats of Japlac cream.
After leaving the paint to harden for a few days the cab was placed on the chassis for the final time and bolted in position. The cab floor, now painted matt black, was fitted along with the seats, then the toe boards and the cover around the front wheel were cut from thin plywood, glued in position and painted. With the front badge finally screwed in place the model looked complete for the first time in many years, and was completed just in time for the Mechanical Horse Clubs 30th anniversary event at the Severn Valley Railway’s Kidderminster Station!
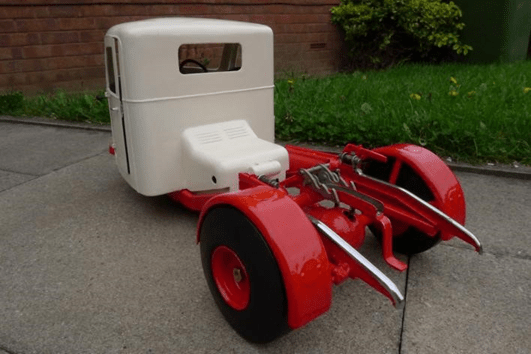

The model was displayed on the club stand in the station concourse (an amazing building by the way if you’ve not been) and created a lot of interest over the weekend. One visitor to the stand, who I think was a member of the railway, was a very keen Bassett-Lowke enthusiast but he wasn’t aware of the Scammell demonstration models. He was very pleased to see it though and went away a very happy man, what more could you ask for?
Tony Wiese
